GuardDuty — 脅威検出・データソース・自動修復パイプライン
GuardDutyのデータソース、保護プラン、Finding種別、EventBridge連携による自動修復を徹底解説
GuardDutyとは — Amazon Intelligence層の脅威検出エンジン
Amazon GuardDutyは、リアルタイム脅威インテリジェンス に基づいてAWSアカウント内の悪意のある活動を自動検出するマネージド脅威検出サービスです。
基本特性:
- 検出のみ: 防御ではなく、脅威を検知して通知する
- Intelligence駆動: AWS、業界パートナー、脅威情報から常時更新される脅威インテリジェンス
- 複数データソース統合: VPC Flow Logs、CloudTrail、DNS、S3、EKS、Lambda、RDS、EBS など
- マネージド: パッチ、インテリジェンスフィード更新、スケール管理は AWS が担当
- リージョン単位: 各リージョンで独立有効化が必要
試験で狙われるポイント
- GuardDuty ≠ 防御: 検出エンジンであり、実際の攻撃を止めることはできない
- 複数データソース理解: どのデータソースからどの脅威を検出するか
- 自動修復パイプライン設計: EventBridge + Lambda による検出後自動対応
- マルチアカウント管理: Organizations 統合と委任管理者パターン
- 他サービス連携: Security Hub、Detective、SNS、Lambda の組み合わせ方
GuardDutyのデータソースと検出フロー
Loading diagram...
1. GuardDutyのデータソース詳細
1.1 VPC Flow Logs(ネットワークトラフィック分析)
検出対象:
- 異常な送信元からのアクセス
- 暗号通貨マイニングプール通信(既知の C&C アドレス宛通信)
- DDoS ボットネット活動
- AWS API への異常なポート使用(例:SSH → port 22 以外での探索)
実装例:
{
  "version": "0",
  "id": "12345678-1234-1234-1234-123456789012",
  "detail-type": "GuardDuty Finding",
  "source": "aws.guardduty",
  "account": "123456789012",
  "time": "2026-04-27T10:30:00Z",
  "region": "ap-northeast-1",
  "resources": [],
  "detail": {
    "finding": {
      "type": "NetworkInterface Finding: EC2.NetworkAnomalyDetection",
      "severity": 7.5,
      "accountId": "123456789012",
      "resourceId": "i-1234567890abcdef0",
      "principalId": "arn:aws:iam::123456789012:user/attacker",
      "serviceDetails": {
        "networkInterface": {
          "ipv4Addresses": ["10.0.0.42"],
          "ipv6Addresses": [],
          "outboundConnections": {
            "totalCount": 42,
            "remoteIpDetails": {
              "ipAddressV4": "203.0.113.1",
              "organization": "CryptoMiningPool"
            }
          }
        }
      }
    }
  }
}
CloudWatch で確認:
- VPC Flow Logs の REJECT フローは GuardDuty が自動分析
- GuardDuty 有効化時、Flow Logs は自動的に有効化される(追加料金あり)
1.2 CloudTrail(API呼び出しの異常検出)
検出対象:
- 不正な IAM ロール引き受け(AssumeRole)
- 暗号化キーの大量削除(KMS DeleteKey)
- セキュリティグループルールの危険な変更
- CloudTrail ログ削除試行(改ざん痕跡隠蔽)
- 異常なデータエクスポート(Athena/Redshift から大規模データ抽出)
Finding例:
- UnauthorizedAccess:IAMUser/ConsoleLogin → 既知の悪意のある IP から管理コンソールへのログイン試行
- UnauthorizedAccess:IAMUser/InstanceCredentialExfiltration → EC2 インスタンスロールの認証情報が公開インターネットから使用
- UnauthorizedAccess:Lambda/TorIPCaller → Tor ネットワーク出口ノード経由で Lambda を呼び出し
- CryptoCurrency:EC2/BitcoinTool.B!DNS → ビットコイン採掘ツールがDNS問い合わせを実施
注意: CloudTrail は Organizations Trail でも GuardDuty と統合。複数アカウントの API 異常を一元検出可能。
1.3 DNS ログ(悪意のあるドメイン通信検出)
検出対象:
- マルウェア C&C サーバーへのドメイン問い合わせ
- 暗号通貨マイニングドメイン
- データ流出先ドメイン
- DGA(Domain Generation Algorithm)で生成される不自然なドメイン
実装:
EC2 インスタンス内で Route 53 Resolver エンドポイント配下 DNS クエリ
  → VPC DNS ログ(VPC Flow Logs の DNS 記録)
  → GuardDuty が既知悪意ドメイン DB と照合
  → Finding: NetworkInterface Finding: EC2.DnsQueryDetection
ベストプラクティス: VPC 内すべてのサブネットで DNS ログ有効化
1.4 S3 保護(S3 アクセス異常検出)
検出対象:
- AWS マネジメントコンソール外からのバケットスキャン(s3:ListBucket、s3:GetObject 大量実行)
- ランサムウェアによる暗号化前のデータ列挙
- 外部 IP からのアクセストークン悪用による S3 読み込み
- 権限昇格後のデータエクスポート
有効化方法:
# AWS CLI で GuardDuty S3 保護を有効化
aws guardduty create-detector \
  --finding-publishing-frequency FIFTEEN_MINUTES \
  --detector-type GUARDDUTY \
  --data-sources \
    S3Logs={Enable=true} \
    Kubernetes={EksClusterDetails={Enable=true}} \
    MalwareProtection={ScanEc2InstanceWithFindings={EbsVolumes=true}} \
  --region ap-northeast-1
Finding例:
S3:ObjectBehaviorAnomalyDetection
  {
    "severity": 5.3,
    "bucket": "company-data-bucket",
    "object": "customer-pii/2026/batch.parquet",
    "anomalyDetection": {
      "activityType": "GetObject",
      "requestCount": 15000,
      "expectedRequestCount": 23
    }
  }
1.5 EKS 保護(コンテナ環境の脅威検出)
検出対象:
- 異常な Pod 生成(CronJob で大量不正 Pod 起動)
- 管理者権限での Pod 実行(privileged コンテナの悪用)
- AWS API エクスポーズ(IMDS v2 必須化を回避した認証情報窃取)
- Kubernetes API への不正なクエリ(etcd スクレイピング)
有効化:
aws guardduty create-detector \
  --finding-publishing-frequency FIFTEEN_MINUTES \
  --data-sources \
    Kubernetes={EksClusterDetails={Enable=true}} \
  --region ap-northeast-1

# または既存 Detector を更新
aws guardduty update-detector \
  --detector-id 12abc34d567e8fa901bc2d3e45f6a7b8 \
  --data-sources \
    Kubernetes={EksClusterDetails={Enable=true}}
Finding例:
Kubernetes:Behavior/MaliciousIPCaller.Custom
Kubernetes:Behavior/UnusualVolumeMountActivity
Kubernetes:Behavior/UnusualContainerEscapeActivity
1.6 Lambda 保護(サーバーレス実行の脅威検出)
検出対象:
- Lambda 関数からの外部 C&C 通信
- 異常なリソース消費(暗号マイニング Lambda)
- Lambda 関数ロールの権限昇格試行
- Lambda レイヤーへの悪意のあるコードインジェクション
有効化:
aws guardduty create-detector \
  --finding-publishing-frequency FIFTEEN_MINUTES \
  --data-sources \
    Lambda={RuntimeMonitoring={Enable=true}}
監視される情報:
- Lambda 関数の実行ログから異常パターン検出
- 関数が呼び出すサービス(S3、DynamoDB など)の異常
- Lambda 実行ロール権限の不適切な使用
1.7 RDS 保護(データベース脅威検出)
検出対象:
- ランサムウェアによる暗号化、削除前のデータスキャン
- 外部スクリプトからの大量データ吸い上げ
- RDS Proxy を介したコネクション異常(ブルートフォース等)
- 異常な SQL クエリパターン
有効化:
aws guardduty create-detector \
  --data-sources \
    RdsLoginAnomalyDetection={Enable=true}
1.8 マルウェア保護(EBS ボリュームスキャン)
検出対象:
- EC2 インスタンスに接続された EBS ボリューム内の既知マルウェア
- Rootkit、バックドア、トロイの木馬
- ランサムウェア
有効化:
aws guardduty create-detector \
  --data-sources \
    MalwareProtection={
      ScanEc2InstanceWithFindings={
        EbsVolumes=true,
        TagsResults=[{
          "key": "Environment",
          "value": "Production"
        }]
      }
    }
重要な制約:
- 初回スキャンは手動トリガー:
start-malware-scanで EBS ボリュームをスキャン - スキャン時間: ボリュームサイズにより 1 時間〜数時間
- I/O パフォーマンス低下: スキャン中にボリュームへのアクセスが低速化
- 追加料金: GB 単位で課金(EBS ボリューム容量の大きさに依存)
API呼び出し例:
aws guardduty start-malware-scan \
  --detector-id 12abc34d567e8fa901bc2d3e45f6a7b8 \
  --resource-arn arn:aws:ec2:ap-northeast-1:123456789012:volume/vol-1234567890abcdef0 \
  --region ap-northeast-1

# 結果を確認
aws guardduty describe-malware-scans \
  --detector-id 12abc34d567e8fa901bc2d3e45f6a7b8 \
  --region ap-northeast-1
2. 保護プランと機能レベル
| 機能 | 基本 (EC2/CloudTrail) | S3 拡張 | EKS 拡張 | Lambda 拡張 | RDS 拡張 | マルウェア |
|---|---|---|---|---|---|---|
| EC2 インスタンス異常検出 | ✓ | ✓ | ✓ | ✓ | ✓ | ✓ |
| CloudTrail API 異常 | ✓ | ✓ | ✓ | ✓ | ✓ | ✓ |
| DNS ログ分析 | ✓ | ✓ | ✓ | ✓ | ✓ | ✓ |
| S3 アクセス異常 | - | ✓ | ✓ | ✓ | ✓ | ✓ |
| EKS コンテナ脅威 | - | - | ✓ | ✓ | ✓ | ✓ |
| Lambda 実行監視 | - | - | - | ✓ | ✓ | ✓ |
| RDS ログイン異常 | - | - | - | - | ✓ | ✓ |
| EBS マルウェアスキャン | - | - | - | - | - | ✓ |
| 追加コスト | 無料 | $0.30/日 | $1.20/日 | $0.50/日 | 可変 | 可変 |
選択の判断基準:
- 新規アカウント: すべての保護プランを有効化(コスト < $3/日)
- 既存運用: リスク領域から優先有効化(S3 → EKS → Lambda)
- コスト重視: 基本 + S3 で 9 割のユースケースをカバー
3. GuardDuty Finding の種別と重大度
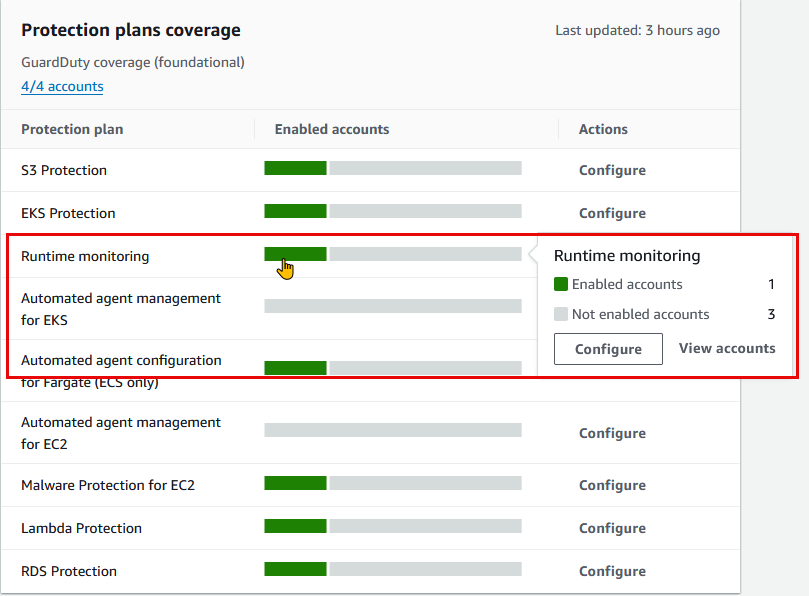
GuardDuty マネジメントコンソール画面
GuardDuty のダッシュボードとフィルタリング画面は以下のように表示されます。

3.1 Finding タイプの分類
Trojan(トロイの木馬)系:
EC2/Trojan.Generic!DNS          → ECS/EC2 上のトロイ木馬 DNS 通信
Lambda/Trojan.Generic!DNS       → Lambda 関数のトロイ木馬活動
Kubernetes/Trojan.Generic!DNS   → コンテナイメージに含まれるトロイ
Cryptocurrency(暗号通貨)系:
EC2/BitcoinTool.B!DNS           → ビットコイン採掘ツール
CryptoCurrency:EC2/BitcoinDomainRequest.B
                                 → 採掘プール通信
IAM 関連:
UnauthorizedAccess:IAMUser/ConsoleLogin
                                 → 不正なコンソールログイン
UnauthorizedAccess:IAMUser/InstanceCredentialExfiltration
                                 → インスタンスロール認証情報窃取
UnauthorizedAccess:IAMUser/MaliciousIPCaller
                                 → 既知悪意 IP からのAPIコール
Kubernetes:
Kubernetes:Behavior/PrivilegedContainerLaunched
                                 → 管理者権限 Pod 起動
Kubernetes:Behavior/UnusualProcessExecution
                                 → コンテナ内の不正プロセス実行
3.2 Finding の重大度スケール
| 重大度 | 値 | 対応例 |
|---|---|---|
| 低 | 1.0-3.9 | 単発の異常 IP アクセス、既知マルウェアではない |
| 中 | 4.0-6.9 | 暗号通貨マイニング検出、権限昇格試行 |
| 高 | 7.0-8.9 | C&C 通信検出、インスタンス認証情報流出 |
| 非常に高 | 9.0+ | ランサムウェア活動確認、データ流出進行中 |
カスタマイズ例:
# 低重大度は除外ルール設定
aws guardduty create-filter \
  --detector-id 12abc34d567e8fa901bc2d3e45f6a7b8 \
  --name "low-severity-suppression" \
  --action NOOP \
  --finding-criteria '{
    "Criterion": {
      "severity": {"Gte": 0, "Lte": 3.9}
    }
  }'
4. できないこと・制約
4.1 リアルタイム防御ではない
❌ GuardDuty: 「悪意の通信を検出して通知する」
✓ WAF: 「悪意のリクエストを遮断する」
✓ Security Groups: 「ネットワークアクセスを制御する」
実装例(実際の防御の流れ):
1. EC2 インスタンスが C&C サーバーに接続
2. GuardDuty が Finding を生成(3-5分後)
3. EventBridge ルールが Lambda をトリガー
4. Lambda が接続中のプロセスを調査・強制終了 ← ここで初めて防御
5. SecurityGroup で送信先 IP をブロック
4.2 リージョンごと有効化が必要
# 東京リージョンで有効化
aws guardduty create-detector --region ap-northeast-1

# 大阪でも有効化(別の Detector)
aws guardduty create-detector --region ap-osaka

# グローバルリソース(CloudFront、IAM)の脅威は
# 「us-east-1」Detector で検出される(クロスリージョン検出)
4.3 カスタムルール、シグネチャ定義不可
❌ 「特定の SQL パターンを検出」
❌ 「カスタムマルウェアシグネチャ追加」
✓ 「信頼済み IP / 脅威リスト」設定のみ
5. 抑制ルール(Suppression Rules)と信頼済みリスト
5.1 抑制ルール(False Positive 対策)
問題シナリオ:
セキュリティスキャンツール → GuardDuty が「悪意あり」と判定
→ 毎日 1000 件の Finding 生成(誤検知)
→ アラート疲れ
解決策:
# スキャンツール用 IP を抑制
aws guardduty create-filter \
  --detector-id 12abc34d567e8fa901bc2d3e45f6a7b8 \
  --name "suppress-security-scanner" \
  --action NOOP \
  --finding-criteria '{
    "Criterion": {
      "networkConnectionAction.remoteIpDetails.ipAddressV4": {
        "Eq": ["203.0.113.42"]
      },
      "type": {
        "Eq": [
          "UnauthorizedAccess:IAMUser/MaliciousIPCaller",
          "Recon:EC2/PortSweep"
        ]
      }
    }
  }' \
  --region ap-northeast-1
5.2 信頼済み IP リスト(Trusted IP List)
用途: 外部のセキュリティスキャナ、SIEM、パートナー企業からの通信を事前承認
# S3 に信頼済み IP リストをアップロード
cat > trusted-ips.txt <<EOF
203.0.113.42
203.0.113.43
203.0.113.44
EOF

aws s3 cp trusted-ips.txt s3://my-guardduty-bucket/trusted-ips.txt

# GuardDuty に信頼済みリストを登録
aws guardduty create-ip-set \
  --detector-id 12abc34d567e8fa901bc2d3e45f6a7b8 \
  --name "trusted-security-vendors" \
  --format TXT \
  --location s3://my-guardduty-bucket/trusted-ips.txt \
  --activate true \
  --region ap-northeast-1
5.3 脅威 IP リスト(Threat Intelligence)
用途: GuardDuty に上乗せする脅威インテリジェンス(カスタム脅威 IP)
# カスタム脅威 IP リスト
cat > threat-ips.txt <<EOF
192.0.2.100
198.51.100.50
EOF

aws s3 cp threat-ips.txt s3://my-guardduty-bucket/threat-ips.txt

# GuardDuty に脅威リストを登録
aws guardduty create-threat-intel-set \
  --detector-id 12abc34d567e8fa901bc2d3e45f6a7b8 \
  --name "custom-threat-intel" \
  --format TXT \
  --location s3://my-guardduty-bucket/threat-ips.txt \
  --activate true \
  --region ap-northeast-1
6. ユースケース実装パターン
6.1 不正 API コール検知 → 自動 IAM ユーザー無効化
シナリオ: 侵害された IAM アクセスキーが不正な API コールを実行
実装フロー:
GuardDuty Finding
  "type": "UnauthorizedAccess:IAMUser/ConsoleLogin"
  "severity": 7.5
    ↓
EventBridge ルール(Finding → Lambda)
    ↓
Lambda 関数: 該当 IAM ユーザーのアクセスキーを無効化
    ↓
SNS 通知:セキュリティチームに報告
EventBridge ルール定義:
{
  "Name": "GuardDuty-UnauthorizedAccessHandler",
  "EventPattern": {
    "source": ["aws.guardduty"],
    "detail-type": ["GuardDuty Finding"],
    "detail": {
      "finding": {
        "type": [
          "UnauthorizedAccess:IAMUser/ConsoleLogin",
          "UnauthorizedAccess:IAMUser/InstanceCredentialExfiltration"
        ],
        "severity": [7.0, 7.1, 7.2, 7.3, 7.4, 7.5, 7.6, 7.7, 7.8, 7.9, 8.0, 8.1, 8.2, 8.3, 8.4, 8.5, 8.6, 8.7, 8.8, 8.9, 9.0]
      }
    }
  },
  "State": "ENABLED",
  "Targets": [
    {
      "Arn": "arn:aws:lambda:ap-northeast-1:123456789012:function:GuardDuty-Remediation",
      "RoleArn": "arn:aws:iam::123456789012:role/EventBridgeGuardDutyRole"
    }
  ]
}
Lambda 関数(Python):
import boto3
import json
from datetime import datetime

iam = boto3.client('iam')
sns = boto3.client('sns')

def lambda_handler(event, context):
    finding = event['detail']['finding']
    finding_id = finding['id']
    finding_type = finding['type']
    principal_id = finding['principalId']

    # IAM ユーザー名を抽出
    username = principal_id.split('/')[-1]

    try:
        # 現在のアクセスキーを一覧取得
        response = iam.list_access_keys(UserName=username)

        # すべてのアクティブなアクセスキーを無効化
        for key in response['AccessKeyMetadata']:
            if key['Status'] == 'Active':
                iam.update_access_key(
                    UserName=username,
                    AccessKeyId=key['AccessKeyId'],
                    Status='Inactive'
                )
                print(f"Disabled access key: {key['AccessKeyId']}")

        # SNS で通知
        sns.publish(
            TopicArn='arn:aws:sns:ap-northeast-1:123456789012:SecurityAlerts',
            Subject=f'GuardDuty Alert: {finding_type}',
            Message=f'''
Finding ID: {finding_id}
User: {username}
Type: {finding_type}
Severity: {finding['severity']}
Action: All access keys disabled at {datetime.now().isoformat()}
Principal ID: {principal_id}
            '''
        )

        return {
            'statusCode': 200,
            'body': json.dumps(f'Successfully disabled access keys for {username}')
        }

    except Exception as e:
        print(f'Error: {str(e)}')
        sns.publish(
            TopicArn='arn:aws:sns:ap-northeast-1:123456789012:SecurityAlerts',
            Subject='GuardDuty Remediation Failed',
            Message=f'Failed to remediate {username}: {str(e)}'
        )
        return {
            'statusCode': 500,
            'body': json.dumps(f'Error: {str(e)}')
        }
6.2 暗号通貨マイニング検出 → 自動インスタンス隔離
シナリオ: EC2 インスタンスが暗号通貨マイニング活動を開始
検出フロー:
EC2/BitcoinTool.B!DNS Finding
  → Lambda が SecurityGroup を変更
    → すべてのインバウンド/アウトバウンドを遮断
  → SNS で緊急通知
  → システム管理者が手動調査・復旧
Lambda 関数:
import boto3

ec2 = boto3.client('ec2')
sns = boto3.client('sns')

def lambda_handler(event, context):
    finding = event['detail']['finding']
    resource_id = finding['resource']['instanceDetails']['instanceId']

    # 隔離用 SecurityGroup 取得
    isolation_sg_id = 'sg-isolation-1234567890abcdef0'

    try:
        # インスタンスのセキュリティグループを隔離グループに変更
        ec2.modify_instance_attribute(
            InstanceId=resource_id,
            Groups=[isolation_sg_id]
        )

        # インスタンスをシャットダウン(必須ではないが推奨)
        ec2.stop_instances(InstanceIds=[resource_id])

        # SNS 通知
        sns.publish(
            TopicArn='arn:aws:sns:ap-northeast-1:123456789012:CriticalSecurityAlerts',
            Subject='CRITICAL: Cryptomining Activity Detected',
            Message=f'''
Instance: {resource_id}
Finding: {finding['type']}
Severity: {finding['severity']}

IMMEDIATE ACTIONS TAKEN:
1. Security Group changed to isolation group
2. Instance stopped
3. For investigation, manually start in isolated network

Timestamp: {finding['updatedAt']}
            '''
        )

        return {'statusCode': 200, 'isolated': resource_id}

    except Exception as e:
        sns.publish(
            TopicArn='arn:aws:sns:ap-northeast-1:123456789012:CriticalSecurityAlerts',
            Subject='FAILED: Could not isolate instance',
            Message=f'Instance: {resource_id}, Error: {str(e)}'
        )
        raise
6.3 S3 バケット侵害検知 → 自動スナップショット保存
シナリオ: S3 バケットへの異常なアクセス(データ流出)を検出
実装:
# Step Functions ワークフロー: GuardDuty Finding → S3 スナップショット作成
{
  "Comment": "S3 Compromise Detection and Snapshot",
  "StartAt": "ParseGuardDutyFinding",
  "States": {
    "ParseGuardDutyFinding": {
      "Type": "Task",
      "Resource": "arn:aws:lambda:ap-northeast-1:123456789012:function:ParseS3Finding",
      "Next": "CreateS3Snapshot"
    },
    "CreateS3Snapshot": {
      "Type": "Task",
      "Resource": "arn:aws:states:::aws-sdk:s3:copyObject",
      "Parameters": {
        "Bucket": "snapshot-bucket",
        "Key.$": "$.snapshotKey",
        "CopySource.$": "$.sourceObject"
      },
      "Next": "NotifySecurityTeam"
    },
    "NotifySecurityTeam": {
      "Type": "Task",
      "Resource": "arn:aws:states:::sns:publish",
      "Parameters": {
        "TopicArn": "arn:aws:sns:ap-northeast-1:123456789012:S3CompromiseAlerts",
        "Subject": "S3 Bucket Anomaly Detected - Snapshot Created",
        "Message.$": "$.message"
      },
      "End": true
    }
  }
}
7. マルチアカウント管理(Organizations統合)
7.1 委任管理者パターン
アーキテクチャ:
Management Account (AWS Organizations)
    ↓
Delegated Admin Account (セキュリティ専任)
    ├─ Member Account 1 Detector
    ├─ Member Account 2 Detector
    └─ Member Account 3 Detector
設定手順:
# Management Account で委任管理者を指定
aws organizations register-delegated-administrator \
  --account-id 111111111111 \
  --service-principal guardduty.amazonaws.com \
  --region us-east-1

# Delegated Admin Account で他のアカウント検出器を管理
aws guardduty create-organization-admin-account \
  --admin-account-id 111111111111 \
  --region ap-northeast-1

# 自動メンバー登録を有効化
aws guardduty enable-organization-admin-account \
  --admin-account-id 111111111111 \
  --region ap-northeast-1
メリット:
- 全アカウントの Finding を一元管理
- セキュリティチーム専任アカウントで自動修復ロジック実行
- 新規アカウント作成時に自動的に Detector が有効化
7.2 クロスアカウント EventBridge ルール
設定例:
# Delegated Admin Account で EventBridge ルールを作成
# → すべてのメンバーアカウントの Finding をキャッチ

aws events put-rule \
  --name "guardduty-organization-findings" \
  --event-bus-name "default" \
  --state "ENABLED" \
  --event-pattern '{
    "source": ["aws.guardduty"],
    "detail-type": ["GuardDuty Finding"],
    "detail": {
      "severity": [7.0, 7.5, 8.0, 8.5, 9.0]
    }
  }' \
  --region ap-northeast-1
8. 他サービスとの連携
8.1 Security Hub 統合
用途: GuardDuty Finding を Security Hub の統一ダッシュボードに集約
# Security Hub を有効化
aws securityhub enable-security-hub \
  --region ap-northeast-1

# 自動的に GuardDuty が Standards として登録される
aws securityhub describe-standards \
  --region ap-northeast-1
Security Hub での見方:
- Findings: GuardDuty Finding + その他セキュリティ検出を統合ビュー
- Compliance: CIS ベンチマーク/PCI-DSS に対する準拠状況
- Insights: カスタムフィルタで脅威トレンド分析
8.2 Amazon Detective 統合
用途: Finding の詳細原因分析(ビジュアル脅威グラフ)
# Detective を有効化
aws detective enable-organization-admin-account \
  --admin-account-id 111111111111 \
  --region ap-northeast-1

# GuardDuty Finding から Detective に自動遷移
# (AWS Console: GuardDuty → Finding → "Investigate in Detective")
Detective での分析例:
1. GuardDuty: "UnauthorizedAccess:IAMUser/InstanceCredentialExfiltration" 検出
2. Detective グラフで追跡:
   - どの IP から認証情報が流出したのか
   - その IP はどのような活動をしたのか
   - どのリソースにアクセスしたのか
   - その間のデータ移動がないか
8.3 Lambda + Step Functions 自動修復パイプライン
統合フロー:
GuardDuty Finding
  ↓
EventBridge ルール
  ↓
Step Functions(複数 Lambda の調整)
  ├─ Lambda 1: 脅威 IP の検証
  ├─ Lambda 2: 影響範囲の特定
  ├─ Lambda 3: 自動隔離・ブロック
  └─ Lambda 4: ログ収集・アーカイブ
  ↓
SNS/メール通知
実装例:
{
  "StartAt": "ValidateFinding",
  "States": {
    "ValidateFinding": {
      "Type": "Task",
      "Resource": "arn:aws:lambda:ap-northeast-1:123456789012:function:ValidateFinding",
      "Next": "DetermineAction"
    },
    "DetermineAction": {
      "Type": "Choice",
      "Choices": [
        {
          "Variable": "$.severity",
          "NumericGreaterThanEquals": 8,
          "Next": "ImmediateIsolation"
        }
      ],
      "Default": "LogAndNotify"
    },
    "ImmediateIsolation": {
      "Type": "Task",
      "Resource": "arn:aws:lambda:ap-northeast-1:123456789012:function:IsolateResource",
      "Next": "LogAndNotify"
    },
    "LogAndNotify": {
      "Type": "Task",
      "Resource": "arn:aws:lambda:ap-northeast-1:123456789012:function:SendNotification",
      "End": true
    }
  }
}
8.4 SNS / メール通知
基本設定:
# SNS トピック作成
aws sns create-topic \
  --name guardduty-critical-findings \
  --region ap-northeast-1

# メール購読
aws sns subscribe \
  --topic-arn arn:aws:sns:ap-northeast-1:123456789012:guardduty-critical-findings \
  --protocol email \
  --notification-endpoint security-team@company.com
Finding タイプ別フィルタ通知:
aws events put-rule \
  --name "guardduty-critical-notify" \
  --event-pattern '{
    "source": ["aws.guardduty"],
    "detail": {
      "finding": {
        "type": [
          "UnauthorizedAccess:EC2/MetadataServiceExfiltration",
          "CryptoCurrency:EC2/BitcoinTool.B!DNS",
          "Trojan:EC2/PhishingDomainRequest!DNS"
        ]
      }
    }
  }'
9. ベストプラクティス
9.1 全リージョン有効化戦略
#!/bin/bash
# すべてのリージョンで GuardDuty を有効化

REGIONS=(
  "ap-northeast-1"    # Tokyo
  "ap-northeast-2"    # Seoul
  "ap-southeast-1"    # Singapore
  "eu-west-1"         # Ireland
  "us-east-1"         # N.Virginia
  "us-west-2"         # Oregon
)

for region in "${REGIONS[@]}"; do
  aws guardduty create-detector \
    --finding-publishing-frequency FIFTEEN_MINUTES \
    --data-sources \
      S3Logs={Enable=true} \
      Kubernetes={EksClusterDetails={Enable=true}} \
      Lambda={RuntimeMonitoring={Enable=true}} \
      RdsLoginAnomalyDetection={Enable=true} \
      MalwareProtection={ScanEc2InstanceWithFindings={EbsVolumes=true}} \
    --region "$region"
done
9.2 Finding ノイズ削減(False Positive 対策)
# 1. 既知の安全な通信を抑制
aws guardduty create-filter \
  --detector-id 12abc34d567e8fa901bc2d3e45f6a7b8 \
  --name "trusted-vendor-ips" \
  --action NOOP \
  --finding-criteria '{
    "Criterion": {
      "networkConnectionAction.remoteIpDetails.ipAddressV4": {
        "Eq": [
          "203.0.113.42",
          "203.0.113.43"
        ]
      }
    }
  }'

# 2. セキュリティスキャンツール由来の Finding を抑制
aws guardduty create-filter \
  --detector-id 12abc34d567e8fa901bc2d3e45f6a7b8 \
  --name "security-scanner-suppression" \
  --action NOOP \
  --finding-criteria '{
    "Criterion": {
      "resource.instanceDetails.tags.Name": {
        "Eq": ["security-scanner"]
      },
      "type": {
        "Eq": [
          "Recon:EC2/PortProbeUnprotectedPort",
          "Recon:EC2/PortSweep"
        ]
      }
    }
  }'
9.3 自動修復の段階化
段階 1(低リスク):
- 検出 → ログ記録 → SNS 通知
- 人間が確認後に手動対応
段階 2(中リスク):
- 検出 → SNS 通知 → Lambda で影響範囲調査
- 管理者が自動修復を承認(待機状態)
段階 3(高リスク):
- 検出 → 即座に隔離(SecurityGroup 変更、インスタンス停止)
- 事後に詳細レポート作成
def lambda_handler(event, context):
    severity = event['detail']['finding']['severity']

    if severity >= 8.0:
        # 即座に隔離
        isolate_resource(event)
        send_critical_alert(event)
    elif severity >= 6.0:
        # 検査 + 待機
        investigate_and_wait(event)
    else:
        # ログと通知のみ
        log_finding(event)
        send_notification(event)
10. 試験攻略まとめ
| ポイント | 要点 |
|---|---|
| GuardDuty の本質 | 検出エンジン、防御ではない |
| 複数 Detector 管理 | リージョンごと独立、Organizations 統合推奨 |
| Finding の種別 | Trojan/Crypto/IAM/Kubernetes 各カテゴリ |
| データソース優先度 | CloudTrail > VPC Flow Logs > DNS > S3 > EKS > Lambda > RDS |
| 自動修復の実装 | EventBridge + Lambda + Step Functions の組み合わせ |
| マルチアカウント | Delegated Admin で一元管理、Organizations 連携必須 |
| 他サービス連携 | Security Hub(統合)、Detective(詳細分析)、SNS(通知) |
| False Positive 対策 | 抑制ルール、信頼済み IP リスト、脅威 IP リスト |
| ベストプラクティス | 全リージョン有効化、段階化修復、ノイズ削減 |
11. 連携パターン実装例
シナリオ:セキュリティ自動化の完全フロー
1. GuardDuty が Finding を検出
   ↓
2. EventBridge が検出タイプ別に Lambda/Step Functions をトリガー
   ↓
3. Lambda が影響範囲を特定・調査
   ↓
4. 重大度に応じた自動修復(段階化)
   ├─ 低: ログ記録のみ
   ├─ 中: 隔離 + 人間確認待ち
   └─ 高: 即座隔離 + 事後報告
   ↓
5. Step Functions が複数アクションを調整
   ├─ SecurityGroup 変更
   ├─ IAM 権限無効化
   ├─ スナップショット作成
   └─ ログアーカイブ
   ↓
6. SNS + CloudWatch Logs で監視チームに通知
   ↓
7. Security Hub ダッシュボードで一元管理このパターンにより、検出から修復まで平均 2 分以内 の自動対応が実現できます。